Bringing Art into VR
the secret sauce of Art Plunge!
This article is about bringing paintings to VR, most of the things are lessons learned from making the VR experience Art Plunge.
Here is a video visualization of the basic steps of the process:
Obtain a high resolution original
Scan, photograph or scour the Internet, but make sure that the image:
- contains the entire painting
- has good color balance, not too saturated etc.
- is not clipping, clipping of a single color channel can be hard to spot!
- is in the public domain, or that you have written permission
Clean / Restore
Remove cracks in the paint, fix discoloration etc. Don’t use bilateral filtering or heavy noise reduction, you might want to remove the noise caused by the scanner or camera, but never the noise/detail inherent to the texture of the canvas etc. (The exception is if you want to animate the noise, then you want the image denoised and then add back noise in real-time)
Remove burnt-in lighting and reflections
If the painting was photographed as displayed in a museum, you should expect that it is probably not lit completely uniform.
Reflections are also an issue, even if the canvas is not covered with glass. Reflections can subtly brighten paint in some areas.
Adjust dynamic range
The lighting of paintings by Rembrandt and Vermeer often work very well in VR, however for less realistic paintings, using them to create an environment might feel too extreme or artificial. To improve this, you can try increasing the dynamic range of the image.
For Starry Night, I increased the brightness of the sky compared to the landscape, and the moon and stars compared to the sky. This creates a focus on the sky (which is also animated), the darkness of the landscape and also makes it feels more like night time.
This is not necessarily better, if you aim for a trippier, more intense experience, it’s probably better to stick with something closer to the original!
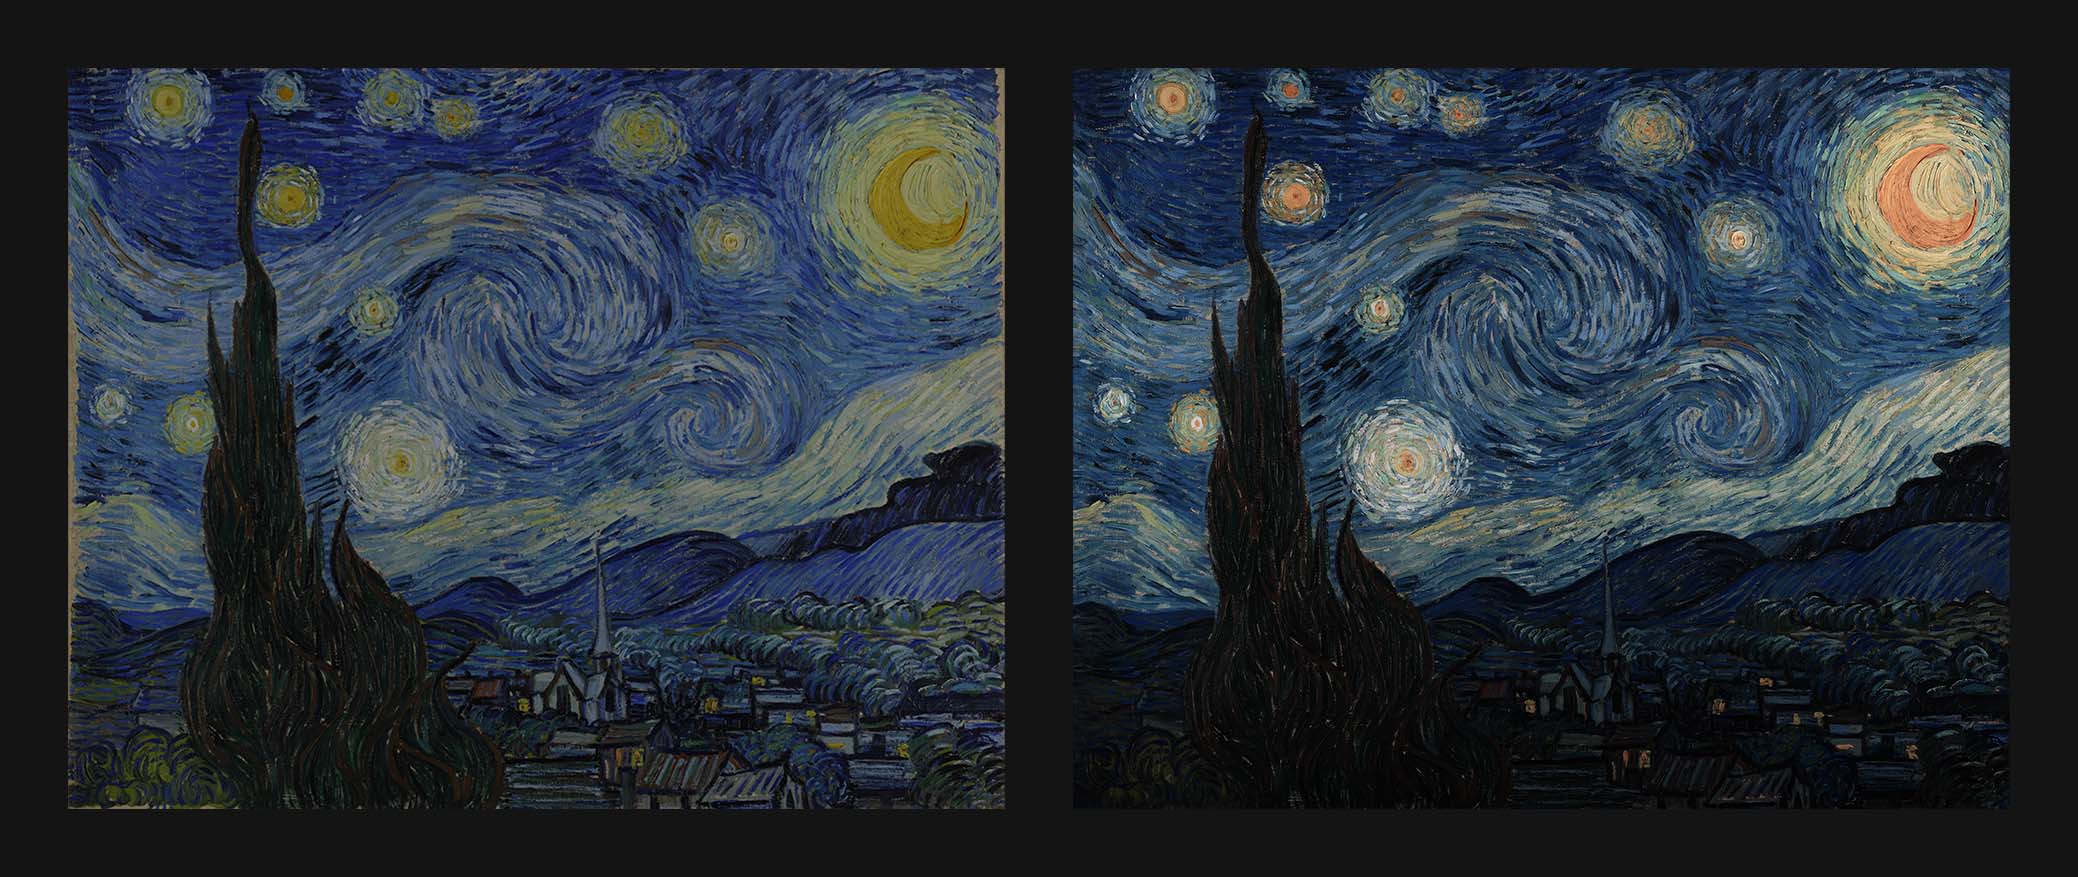
Make sure to iterate in VR before deciding on dynamic range and color grading, just map it to a sphere or plane initially.
Consider VR display limitations
Typical VR displays are not bright enough to represent the brightness of everyday phenomena such as a sky at noon, or even sunlight on a wall. As you can see in the original photo below, the screen at max brightness is a lot darker than the sunlight on the wall (Phones and VR uses the same display technology). Clipping, scaling and compressing is the basic methods to deal with this limitation.

Clipping produces the worst artifacts, such as the discoloring of the table seen above. Using scaling or compression will often work well as our eyes are good at adapting, however on a subconscious level, we still feel brightness levels are not as expected, and this is why a dimly lit room have more potential to feel real in VR than a bright outdoor scene. So regarding lighting scenes, dimmer, softer light with hidden or diffused light sources will be easier to make convincing.
In the case of displaying paintings, dynamic range compression can also change the appearance of the artwork, typically exaggerating darker details and reducing the contrast of the brighter details.
Example from The Kremer Collection VR Museum:
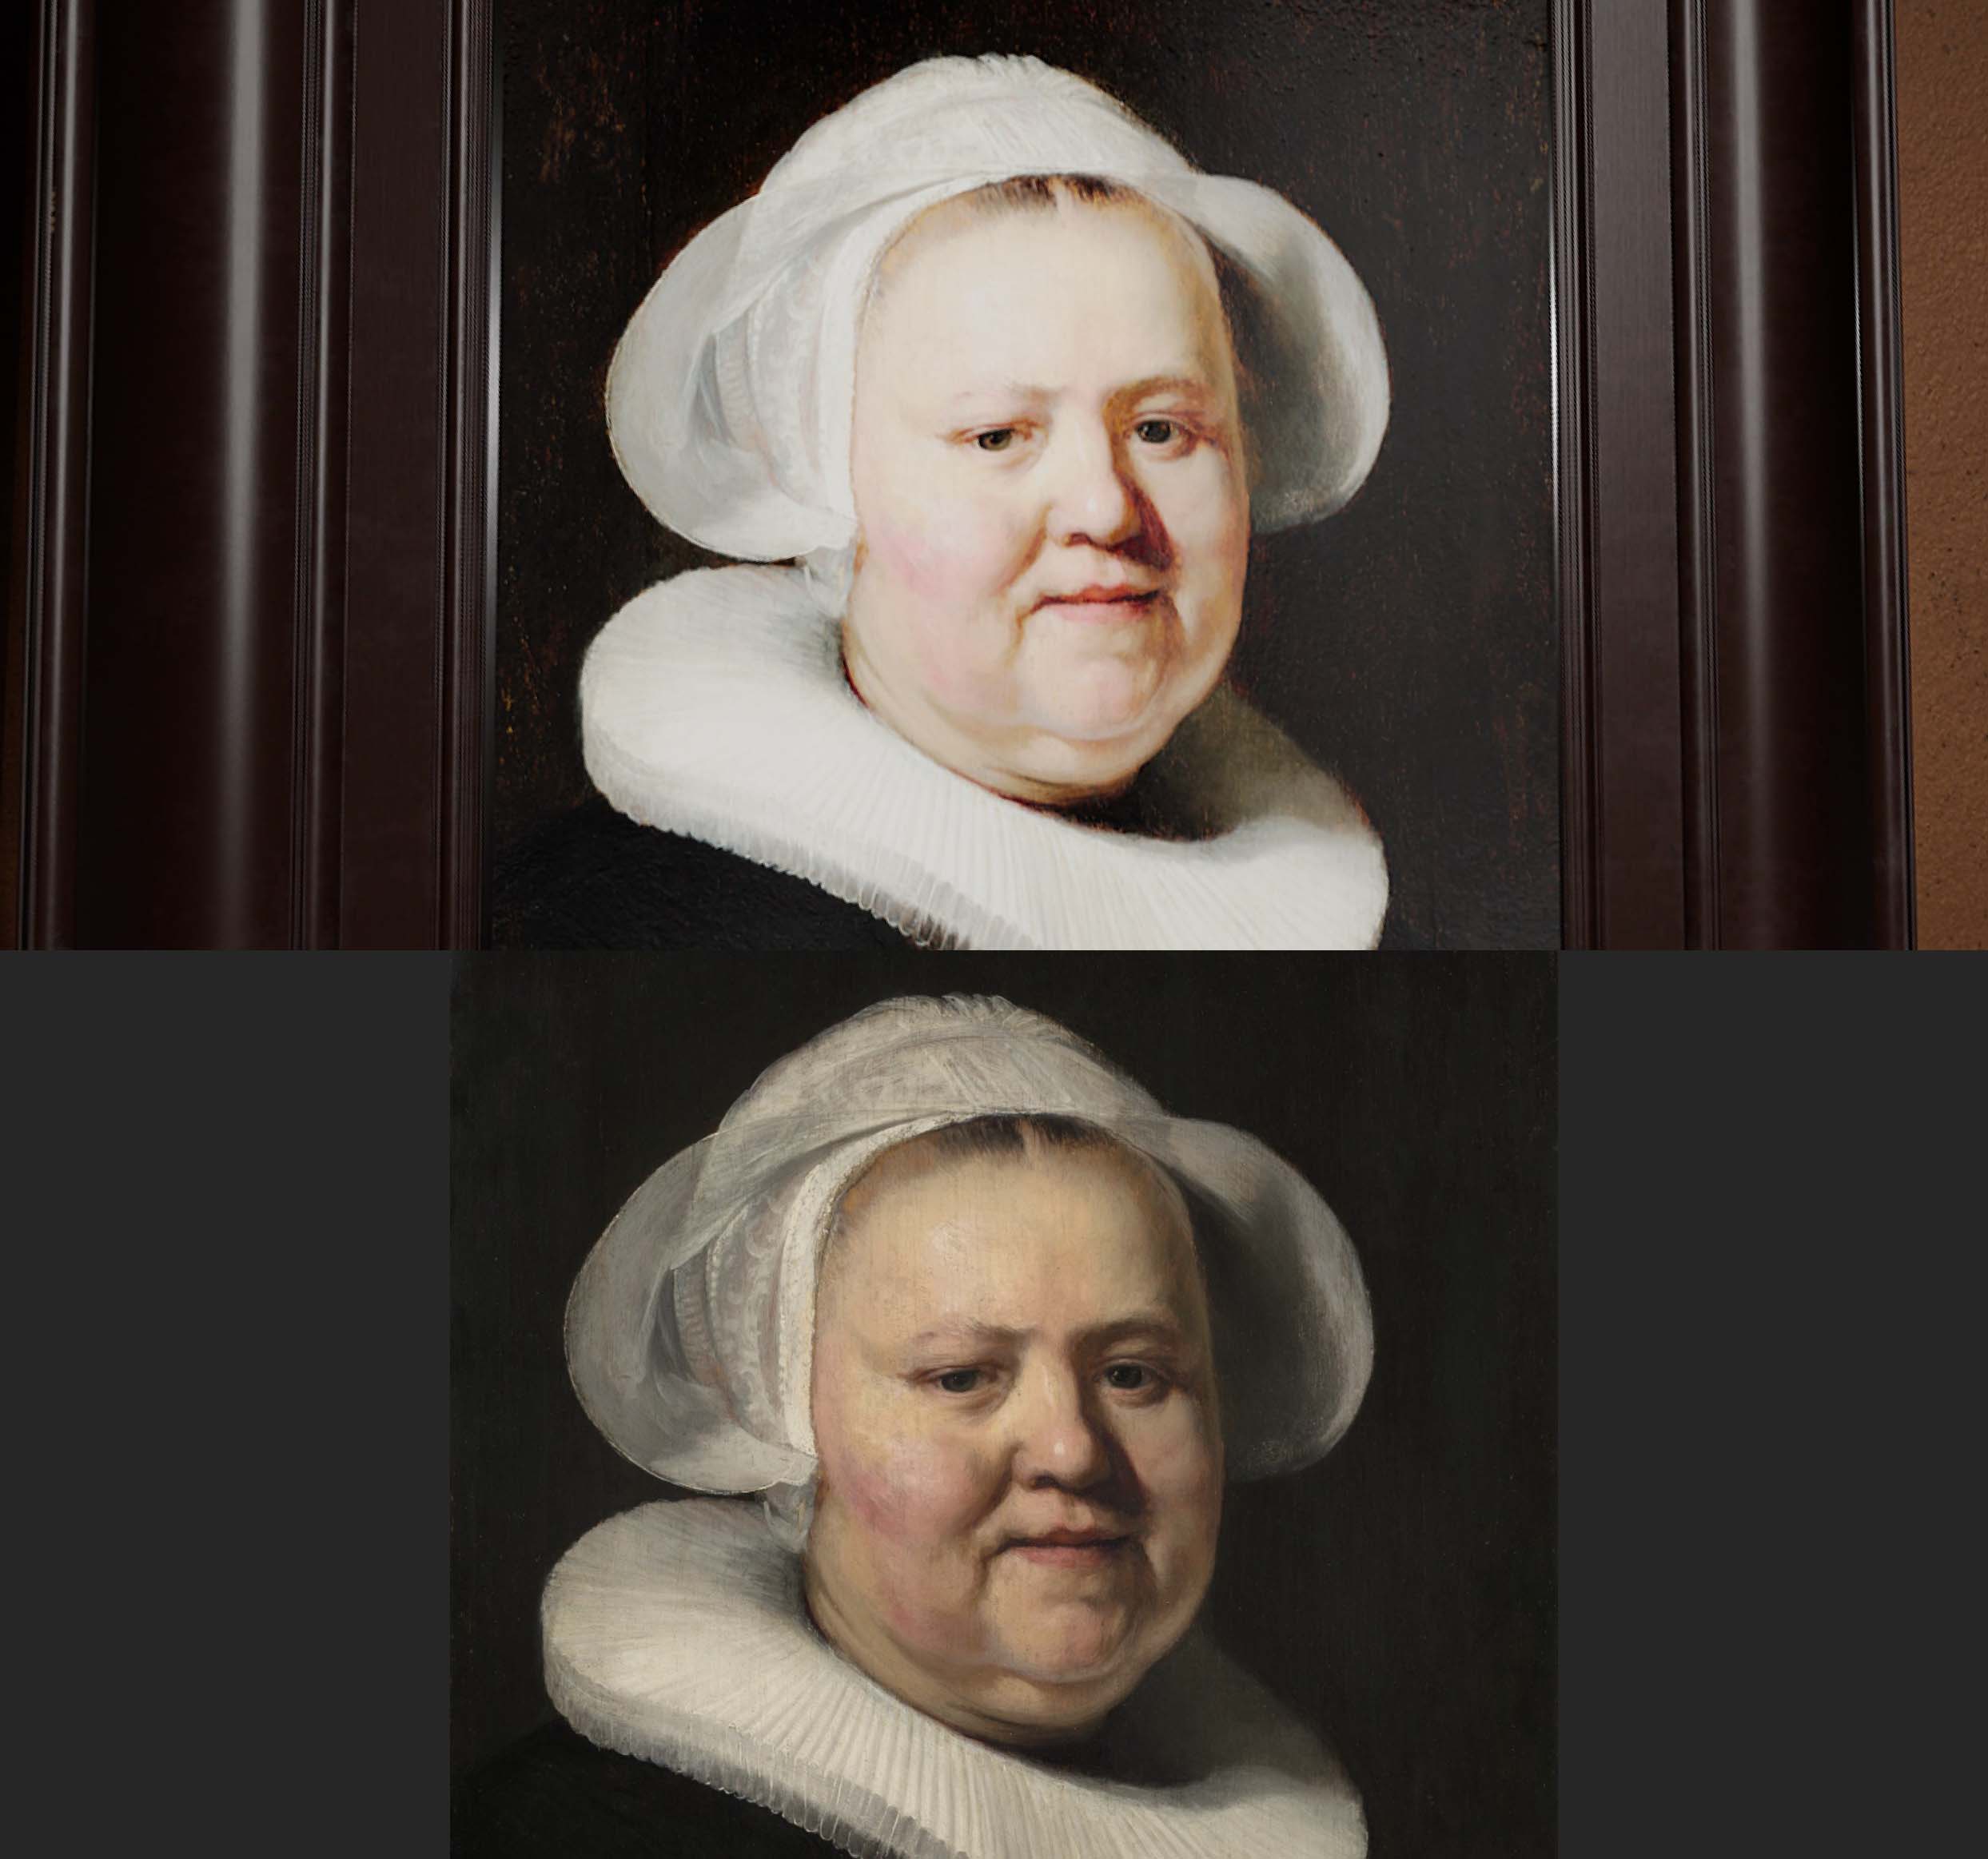
Again, I don’t mean this is a bad thing, it’s a design choice, and you have to choose based on your case. The Kremer Collection is one of the best VR galleries out there and I highly recommend you to check it out!
In Art Plunge, designing for Gear VR and OLED displays, we choose to go with a look that is overall pretty dark, this way we avoid compressing the bright parts, but it also gives a feeling of a museum that is poorly lit.
Also note that most popular headsets like the Quest 2 and 3 uses LCD displays. These displays can not reproduce colors that are very dark or very saturated.
Think hard about movement
How much will the user be able to move around in the scene?
Aiming for both free movement and very high visual quality might take tenfold the effort when creating the experience, so choose wisely. Maintaining the illusion that you are in a magical place is very hard when you can inspect every surface closely.
Extend in 2D
For outdoor environments, it’s usually good to start with expanding the painting in 2D, using the cloning tool/brush. You can of course also just draw or incorporate other images in the same style.
One thing that is not intuitive is how much space there actually is to cover to create a full 360 horizon for 3D:

As you can see, most of the space will be outside the painting, so you’ll need to come up with ideas how to populate all that space!
In order to get decent quality, your original should be at least 16k for 360 degrees. For a horizon/sky that is only shown through a window, you might get away with tiling it.
Keeping it authentic
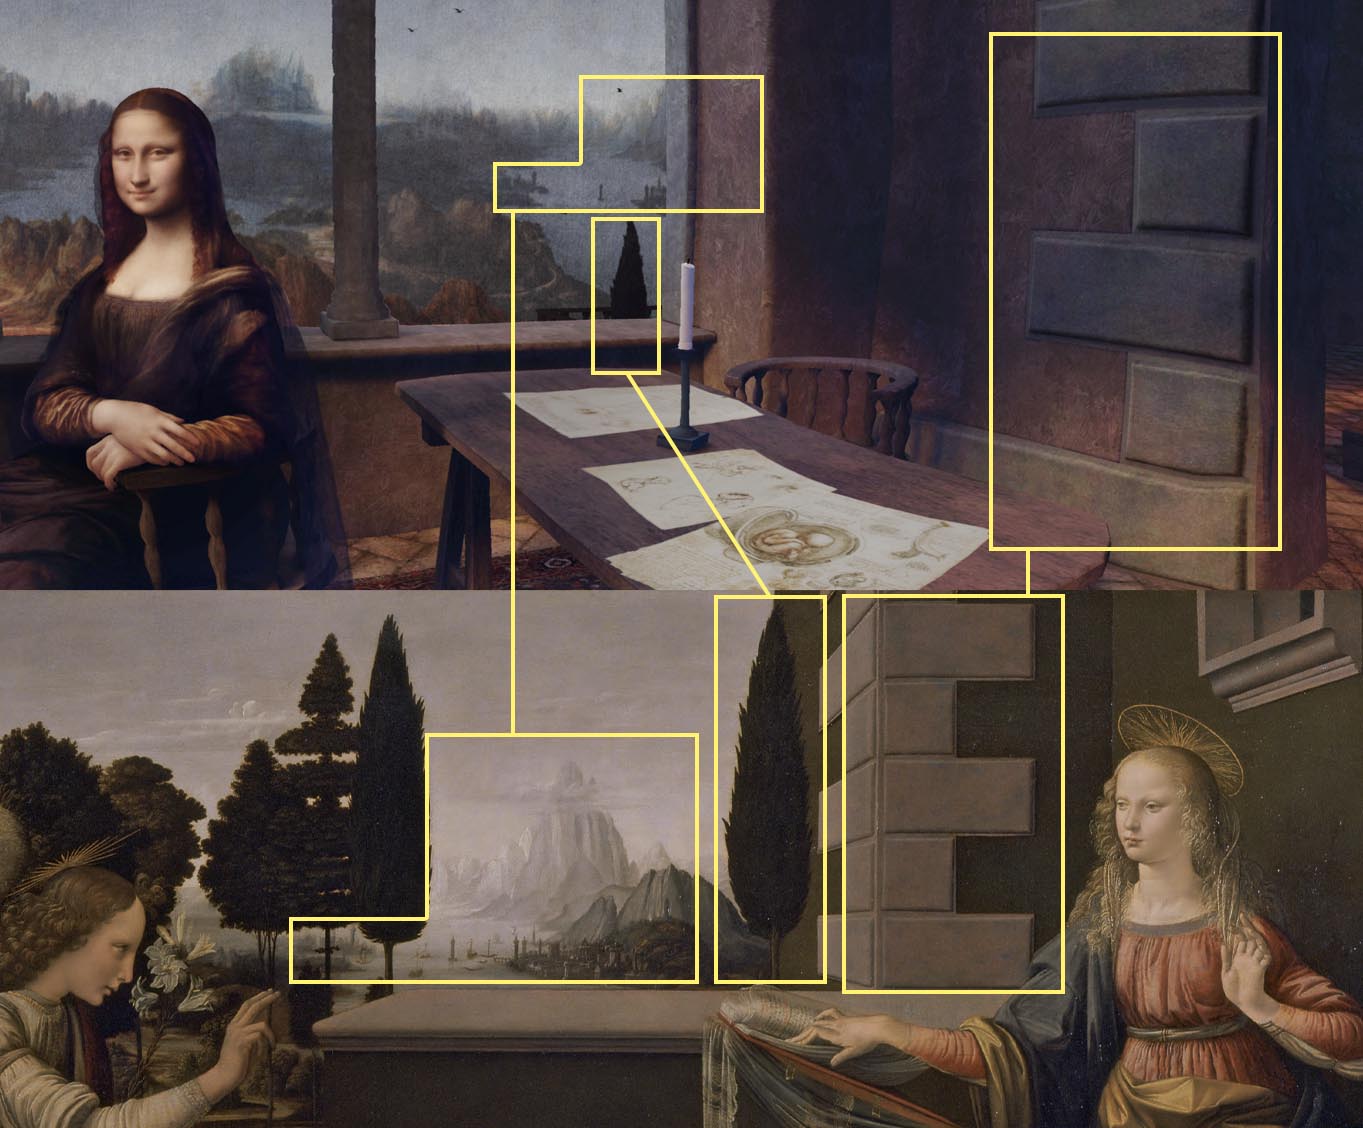
It is hard to paint like Leonardo da Vinci and other legendary artists. A way to make sure the result is somewhat believable is to incorporate other paintings from the same artist.
Below is an example from our Mona Lisa environment, highlighting some details that originate from Annunciation, another painting by Leonardo.
Mixing methods in the same scene
Note in the above example that the background, the tree and Mona Lisa are rendered plainly direct from textures (unlit), but the rest of the scene is lightmapped (based on virtual light sources).
Separate into Layers (2D)
Peel off layer by layer, using clone brush or [AI inpainting], so that you have coverage of important details that are occluded in the painting.
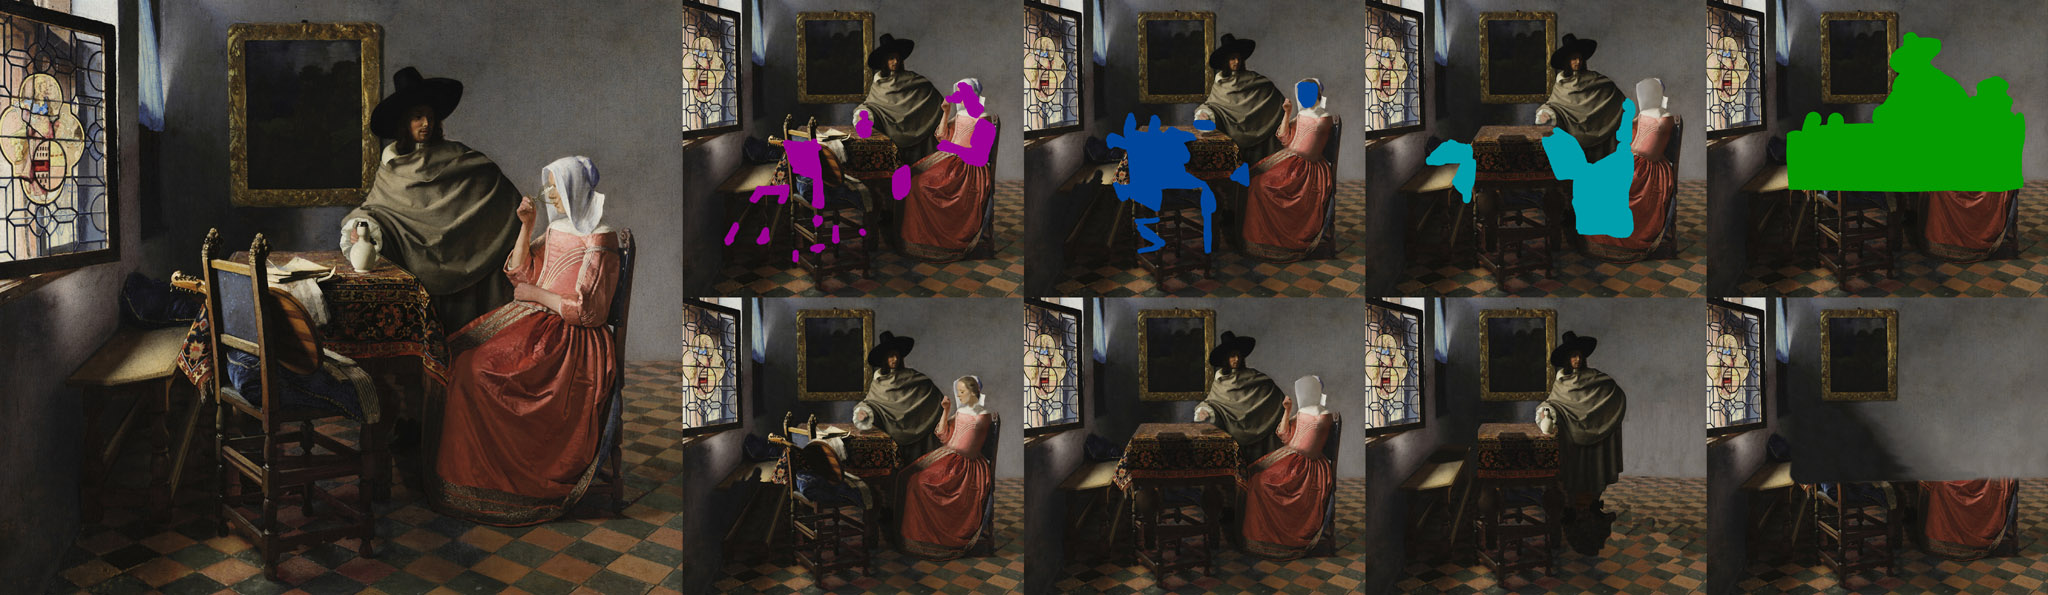
For flat surfaces like floors and walls, it is easier to first project them before you inpaint/extend them.
Establish Camera Transform
Your image might convey more or less information about the environment, in many cases you just have to make a guess about the height and the rotation of the camera, and then iterate on that. If your image depicts clear lines that are parallel, you can use a tool called fSpy to calculate a camera transform.
Model in 3D
Remember that less is more
When using unlit/unshaded rendering, models only need to provide a sense of depth and contour. For every object, you can ask yourself the following questions:
- How close can you get?
- Does it really need to be it’s own object. or can it just be a part of what is behind it? (is the parallax noticeable within your planned movement restriction)
- Is it possible to avoid modelling and simply use a quad, or low poly mesh with transparency?
- Does it need full texturing (all around), or can you texture it from a single direction (using projection)?
Beware of 2D illusions
Even of you model objects in full 3D, they might look 2D from a distance. This is because as the distance grows, the small movements of the head, and the distance between the eyes becomes negligible in comparison. When this happens, human perception will use appearance only to judge depth. So if large/far objects in the original painting looks flat, they will still appear flat even when modelled in 3D. If you want to give a sense of depth while staying true to the original look in these cases, you can either miniaturize the scene or apply a more drastic camera movement. For instance placing the user inside a moving vehicle like a train, or enable teleportation.
Software
We use Blender as our main modelling tool, but any game development workflow should work fine. To quickly export from blender as we iterate, I created this add-on.
Characters
We usually do characters using conventional game development workflows, the main difference being the material/shader is usually unlit since lighting will be baked into the texture. In the future it would be interesting to try to work on some kind of hybrid renderer, to achieve more dynamic lighting, but at the same time preserving the painterly look.
Texture using projection

Use projection mapping to map textures onto geometry. If you want to be able to see the object from more than one side, you also need to transfer or bake the projected map to new map, with a conventional uv set that covers all sides of your mesh.
I created a standalone tool for this called transfer-maps (open source)
It is also possible to do it in blender, using baking, here is a tutorial:
Animation
Even though the previous steps can keep you occupied for some time, the experience will still lack movement and a sense of life.
Character Animation
Use traditional 3D animation timeline workflow to animate characters. Animating large movements, like people walking is hard and often break the illusion and make the experience look like a computer game. Preserve the stillness of the painting, and use only subtle animation to make your characters come alive. People often move less than you imagine. Instead of guessing, it’s almost always better to record a quick video recording of a real human in a similar pose and use as reference.
CPU-based Procedural Animation
- Automatic rotation/movement based on low frequency noise or sinus waves
GPU-based Procedural Animation
- Simple scrolling textures, such as clouds etc.
- Flow Mapping / Texture Morph using vector field
- Particles (Rain / Snow / falling leaves / flying birds / flowers)
- Animated textured noise can help make your environment feel more alive
- Specialized water shaders
Sound
Environment sound, like sound from quiet room, a busy town or a forest is very important for VR immersion!
Realtime simulated sound
Simulated sound means you place mono sound sources in your 3D scene, and the game engine will simulate the sound according to camera movement and sound environment parameters. This only works well for cases where the sound sources are few and where there are clear 3D positions where the sound comes from.
Creating environment sound using only this method is not recommended, as real-time reverbs often sound way too artificial.
Simple stereo mix workflow
A workflow I have often used is just to create a good sounding stereo loop containing environment sound. Then in the 3D engine, place the two channels (left and right) in the 3D scene, but only apply spatializing (3D positioning) at 20% or below. (If you do apply full 3D positioning, sound will turn to mono as the user rotates their head!)
Of course, if there are clear positional sound in the scene, like a character talking, or a waterfall, these then should not be a part of the stereo loop.
Three mono sources
For things like wind, it seems to work well to put three 3D mono sound sources in a large triangle around the user (100% 3D positioned). The drawback is if the user tilt their head, the sound turn to mono.
Ambisonics
Using a multichannel format such as AmbiX, you can create a 3D sound file. This format is used for both VR videos and 360 videos on youtube. In the past, free tools like Facebook 360 Spatial Workstation could be used to create these files, however it seems these tools are no longer supported.
In theory, ambisonics is the correct technical solution to bake 3D audio into a form that takes real-time head rotation into account. However, workflow is cumbersome and I don’t have much experience with it…
A Sense of Awe
I don’t know of a tangible process for creating a sense of awe, but here are some reflections.
From showing Art Plunge at events and conventions I know it can inspire a sense of awe in many people. However, people sometimes react very differently to the same things.
People tend to have different favorites. Some people prefer the more abstract dreamy style of Van Gogh, others the more photo-realistic light of the Vermeer. Some really dislike when the style is too similar to a computer game, others won’t even think about that at all. While some say Creation of Adam is their favorite, others dislike our interpretation because our environment is too different from the original.
Since these are famous works, most people already come with a relationship to the original painting and also the artist. I think these relationships, which are essentially a part of their identity, also influences their sense of awe to a high degree.
Another important factor is probably just production quality, putting in more hours crafting the VR experience makes it better and generally increases the potential to inspire awe. Production quality is a slippery concept though, investing more time is only effective if you are able to evaluate well and make progress fast enough.
Conclusion
Let me know if this was useful! Also let me know if you know of better methods or have suggestions of topics you like me to cover more in future articles!